Background
j2ObjC is a transpiler written and maintained by Google. It compiles java code to equivalent ObjectiveC code to enable mobile developers share common code between their Android and iOS apps. Google already uses this project internally to power production apps like Inbox so we know it is ready for prime time usage.
Motivation
Code sharing
In any meaningful mobile app, there is a chunk of code which relates to the business domain and storing, retrieving and manipulating that data. All of this code is basically the same irrespective of what platform you are writing the app for. This is where we should take advantage of such a tool.
Quicker time to market
Sharing such code between your iOS and Android app will help you reduce development time and increase stability of code.
Leveraging the plethora of Java open-source libraries
There are tons of open source Java projects which can be used very effectively even in an Android application. Projects like Google’s Guava can be very useful in developing an Android application. Imagine if you could use all of those features in your iOS library without writing much code.
Better abstractions
Personally I feel that using this tool will also help you identify the parts of the code which is independent of the platform and hide the platform dependent code behind meaningful abstractions.
Getting started
- Download the built archives from the release page or compile from source
- Make sure the binaries are on the $PATH
Setup options
The main hurdle behind using such tools is that they tend not to integrate well with your regular workflows. But with j2ObjC, we have a multitude of options when it comes to integrating this tool with your day to day projects. The main ways in which you can use j2ObjC are
- Using j2ObjC’s Gradle plugin.
- Using j2ObjC with Xcode build rules.
- Using j2ObjC with Xcode and External Build.
- Using the JRE Emulation project with Xcode.
The Gradle plugin is still under development and keeps updating the structure and way things are to be setup. They are doing great work but since it is still unstable, in this post I will explain the one which I found to be most convenient and easy to setup, namely via Xcode with Build rules
Setting up XCode for j2ObjC
To setup Xcode for building your java source files, follow the below steps.
Determine $source-root for your code. The root directory is the directory that contains the top package of your source files. For example, if you have a Java package foo.bar in a directory called ~/myproject/src, that package’s Java files should be in ~/myproject/src/foo/bar/**.java. That means ~/myproject/src is the root directory for your project.
Add the java source files to your Xcode project, typically by dragging them into the project and selecting the appropriate targets. Do not select
Copy FilesGo to the
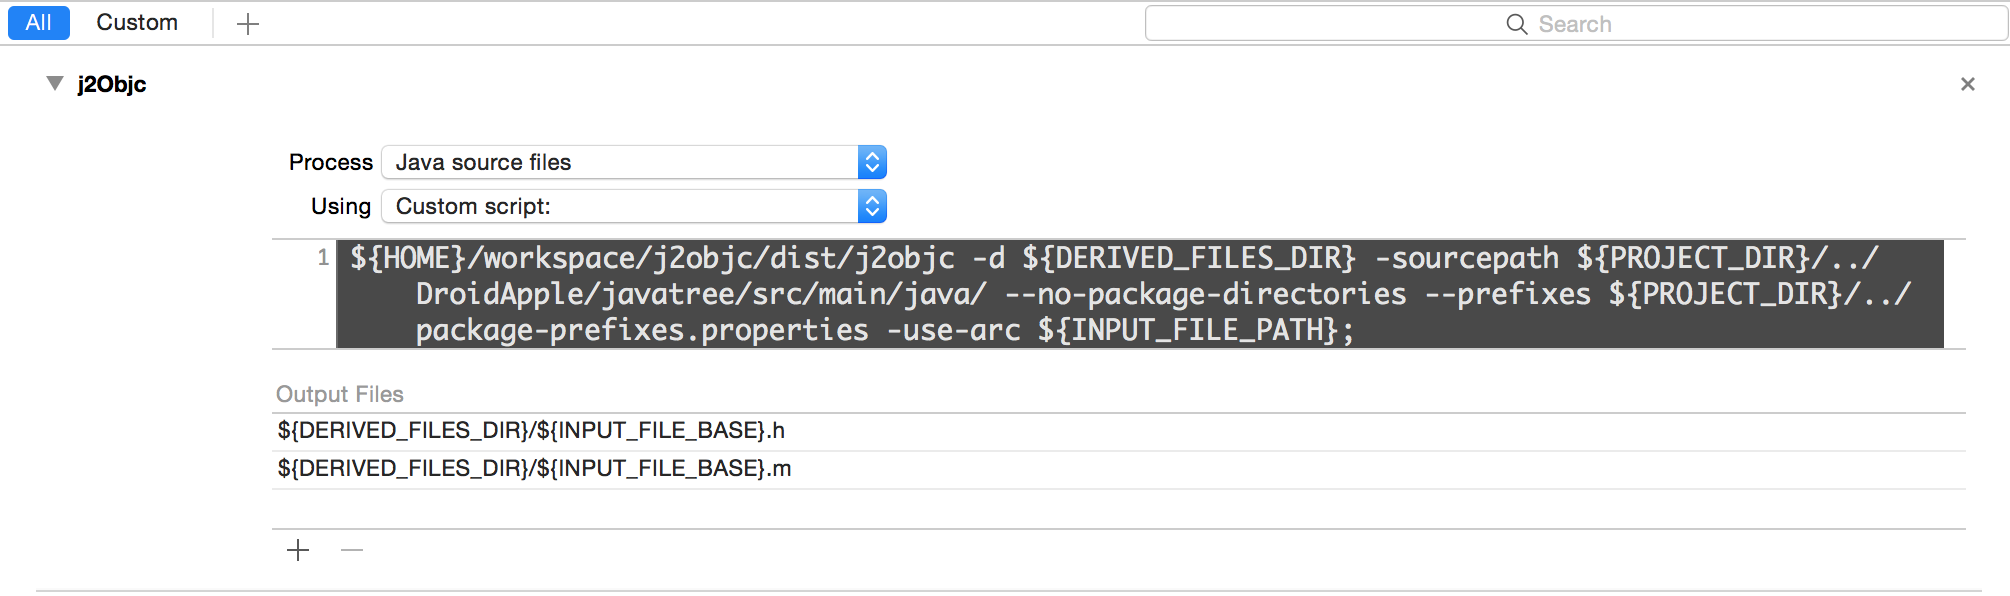
Build Rulessection and add a new section for processing Java source files. SelectCustom scriptto run on each Java file.$distribution-path/j2objc -d ${DERIVED_FILES_DIR} -sourcepath ${PROJECT_DIR}/$source-root \ --no-package-directories ${INPUT_FILE_PATH};Output files
 ${DERIVED_FILES_DIR}/${INPUT_FILE_BASE}.m
 ${DERIVED_FILES_DIR}/${INPUT_FILE_BASE}.h
Build settings
User Header Search Paths
${HOME}/path-to/j2objc/dist/include ${DERIVED_FILES_DIRLibrary Search Paths
${HOME}/path-to/j2objc/dist/libOther Linker Flags
 -ljre_emul
 -ObjC
Required Frameworks
 libz.dylib
 icucore
 Security.framework
Once all of the steps are done, your Build Rules section should look something like this
A typical project structure
Let us now discuss a typical project structure which can help you get started quickly with using j2ObjC.
In your Android project, add a Java library as a subproject and dependency. For example, if your java library is called
javatree, yourbuild.gradleshould look like thisdependencies { compile project(':javatree') compile fileTree(dir: 'libs', include: ['*.jar']) compile 'com.android.support:appcompat-v7:22.1.0' }Add all the platform independent, Java only code in this library and use as required from your Android project. Typical candidates to go into this library would be your business models, your DB interfaces and your util classes.
Add the
javafolder from yoursrc/mainto your Xcode project.Modify the
Build Rulecustom script to point to thesrc/main/javafolder of your java lib.Start coding!
Additional configurations
Naming conventions
By default the j2ObjC tools follows a naming convention where your package name in Java code translates to a camel-cased prefix for your class. For example, com.helpshift.common.storage.KeyValueStorage.java would become ComHelpshiftCommonStorageKeyValueStorage.h/m. If that is a convention you don’t like, or you want your names to be a bit more predictable, you can use the --prefix/--prefixes option of the j2objc tool.
For example, to change the prefix for all classes in the com.helpshift.common.storage package, you would do
1
| |
Or you could specify a list of such package name prefixes in a prefixes.properties file and specify the file as an argument to –prefixes
1
| |
Method renaming
The default naming convention followed when converting Java function signatures to ObjC functions is to append the type of the variable to the method name. For example, public static String toString(byte[] bytes) becomes + (NSString )toStringWithByteArray:(IOSByteArray )bytes;
If this is not to your liking or you want to have similar names in your ObjC code, you can use the method renaming annotations or the --mapping command line option to the j2objc tool.
Annotations
j2objc provides some built-in annotations. One of them is the @ObjectiveCName annotatation available in the com.google.j2objc.annotations.ObjectiveCName; package.
For example
java
@ObjectiveCName(value = "setKey:withObject:")
void set(String key, Object value);

objc
- (void)setKey:(NSString *)key withObject:(id)value;
Mapping
Similar to the prefix option, you can provide the mapping option to the j2objc tool. This option takes a method signature defined by the Java Virtual Machine Specification and its required translation.
For example
org.helpshift.common.storage.KeyValueStorage.set(Ljava/lang/String;Ljava/io/Serializable)V = set:withObject:
org.helpshift.common.storage.KeyValueStorage.get(Ljava/lang/String;)Ljava/lang/Object = objectForKey:
I would highly recommend using the Annotations option since it is much more readable and works more reliably.
Inline native code
J2objc supports embedding native ObjC code within your java sources. All code which lies within /*-[ and ]-*/ will be copied as is into the generated ObjC files. Since this code is commented from Java’s perspective, it will ofcourse be ignored by the Java compiler.
For example, to write a method which calls out to the ObjC code directly you could do this
native public static KeyValueDbStorage getInstance() /*-[
  return [HsKeyValueBundleStorage getInstance];
]-*/;
Conclusion
If you follow the above steps, you will definitely be able to get up and running with a Java and ObjC project with a lot common code. If you have any difficulties in setting things up, please leave a comment.
Next steps
- I am trying to write a python script which will make all the settings changes in Xcode in one shot which will help reduce the time and effort to set things up.
- I will also be publishing a simple project which demonstrate how a typical almost-real world application can look like.